

how do I remove a background in photoshop
Remove background from image photoshop is an important technique to know. Many times, after clicking an image we feel that it is not suitable with that background and then we think about separating the background. A few photo editing software’s are available that can remove the background with full accuracy.
Adobe Photoshop CC is one of the best among all. You are going to know how to separate an image from its background in Photoshop step by step. Let’s jump forward.
There are several selection tools available in Photoshop. Many complain about using the selection tools that they found it tough to utilize them. In this tutorial, I am going to show you how you can eliminate the background without using any kinds of selection tool. This technique is applicable for any kinds of object.
More importantly, working with hair and fur is not difficult anymore.
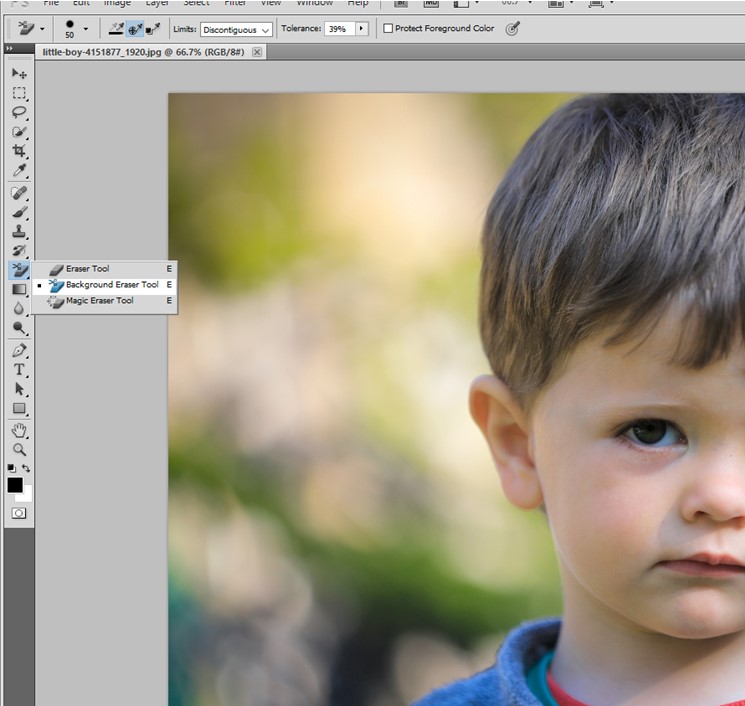
Start with opening the image in Photoshop followed by initializing the Eraser tool.

Then choose background eraser tool from the list.
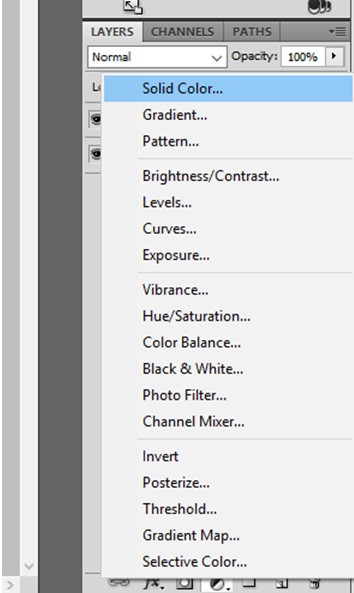
After this, copy the background into a new layer. It’s just for the backup so that you can go back anytime. Open the adjustment layer and choose the solid color option from the top.
Delete background from image from picture
Choose a deep color from the color selection panel; i am doing with pink as my preferable. But you can choose according to your comfortable color. Now you have to bring this color fill layer down to the Copied layer.
Then choose the top layer and step forward.
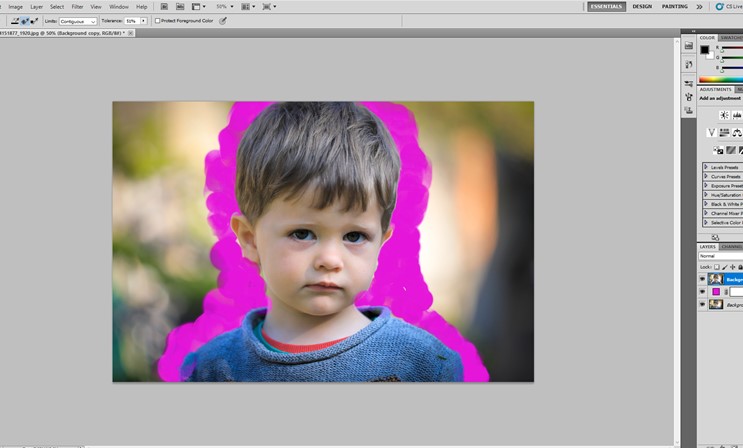
Zoom in to your object that you want to detach. Make the brush size smaller it will make your working process at ease.
In next step, start selecting the boundary line immediately. You will find it pink color while selecting, if select pink in the solid color option. If you are looking for another color change it according to your preference.
Our background removal service do you try.
At the top, there are three types of tools are noticeable.
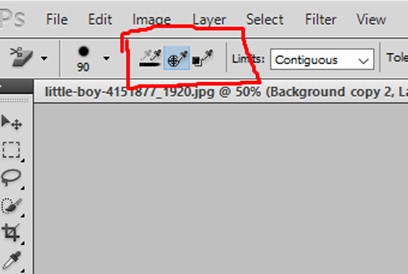
The first one is for continuous painting. It is useful tool for working on a plain background. But it will become unusable when background color changes randomly. The second one can be called as sampling tool. At the time, start from a specific color it will work only one those similar color. But you need to hold on the mouse otherwise, after releasing the brush it will take as sample the next color you choose.
The 3rd one is also like sampling but this is background sampling swatch. This one is not the beneficial like the previous two. It will also remove the image from its image but it may not be useful for background that is changing color constantly.
Now, set the limits to discontiguous from the top for working on hair and fur.
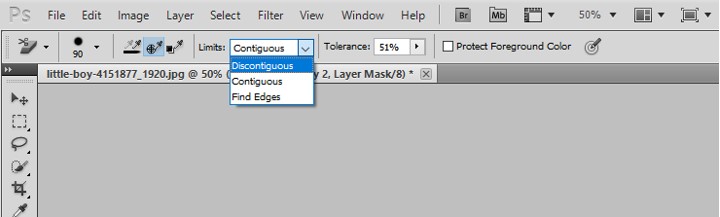
After this, tolerance is an important option to practice. Set the right value of tolerance is important. Otherwise, the object is also going to erase with the background. Don’t need to set the tolerance in too high or too low. One needs to keep the balance right.
Then delete the upper layer and make a copy of the background from the panel of the layer followed by placing it in the above of the layer list.
Formerly, start selecting from the hair with the right number of tolerance.
If you find it difficult to set the right number of tolerance try it with 50. Try decreasing the number of the tolerance in case in your object is also including while erasing.
When working on the body parts, choose the limits find edges. If there is any space in the inner parts of the object remove those too with the perfection.
To do the further process in a non-destructive way makes the copy of the background once again. Then put it above the solid layer.
How to remove background from image photoshop quick & easy with CUT OUT EXPERT
For a clear identification, rename the top layer as Subject 1 followed by clicking on the thumbnail of the image along with CTRL button.
You can turn off the first layer at this stage. This is not any part of our working syllabus anymore.
Rename the 2nd layer into non-destructive charted by pressing on the mask icon from the below.
At this stage, you have to delete the top layer named Subject 1 because it unnecessary. Now go back to the brush option and hold the ALT option at the same time press mask from the beneath. At this point, the things that you need to know are to paint out the extra areas.
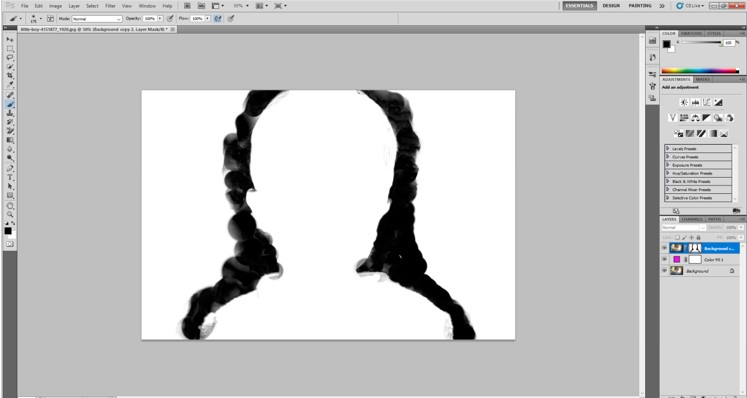
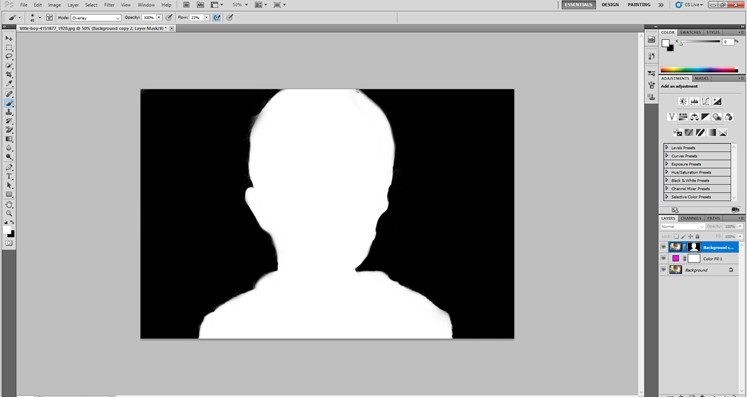
For switching into background and foreground color press on X. Zoom in the picture and turn out the whole background black. Select the edges carefully. Using the over lay option along with pressing X you can bring back the accidently deleted parts.
After completing the task things will look something like that
Remove background from image with adobe photoshop software cut out image
Press the mouse button at the same time you are pressing ALT.
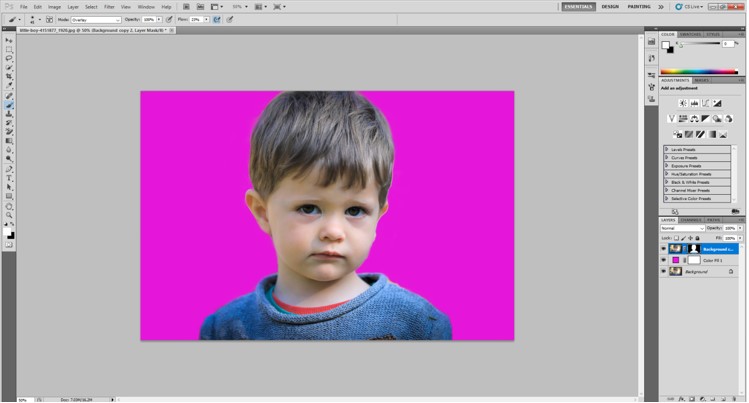
Now, the background has been separated successfully

That’s the process to separate any object from its original layer.
Do You Read Similar Content In Online.
[optin-cat id=9621]


