Lighting is critical for product photography, but the wrong setup can ruin your images. Light setup for product photography can be very simple or complex, depending on the photographer’s needs.
For example, a light stand can position the light in a flattering way for the subject, while a reflector can bounce light off objects to create a more realistic image.
When photographing products, always use a light setup that will allow you to capture the product in the best possible light. This includes choosing the right light for the product, using a backdrop to create a smooth, even image, and using lighting modifiers to adjust the light and make it more flattering.
Why Light setup for product photography is important?
Product photography is critical to any business because it allows customers to see your product in its best light. Your product may look poor and disagreeable to your potential customers without the correct light setup. Additionally, incorrect light can cause glare, reflection, and lens flares that can ruin the look and feel of your product.
Therefore, light setup for product photography is important because it gives the photographer a clear view of the product they are photographing.
By having light coming in from all directions, the photographer can focus on the product while avoiding any shadows or reflections that may come into play. Additionally, perfect lighting can help create a more realistic and eye-catching image.
5 Tips for Product Photography Lighting Setup
Ensure realistic colors
When photographing products, you can do a few key things to make the process more efficient and effective. You can use light sources to create a variety of effects on your photos, depending on the type of photo you are taking. You can also use light sources to help you focus on your product. Here are a few photography tips to help you get the most out of your shots:
Make sure the light is coming from the front of your product. This will produce the brightest and most natural light while minimizing shadows and unwanted castoffs.
Lighting is an important factor in product photography and ensuring realistic colors while setting up the light can be difficult. Proper lighting can help create your photos’ space, direction, and energy.
A white light source will create a clean, evenly lit image without shadows or Highlights. Another tip is to use a reflector. This will add definition and realism to your images. Finally, ensure you have plenty of space between your camera and the subject.
Be Creative with proper lighting

When photographing products, photographers often use props to improve lighting conditions. Props can be anything from a simple light bulb to a real toy.
It’s important to get creative with props and limited resources. Using simple props, you can create uniquely lit shots to help your product stand out from the competition.
For example, a light box or reflector can be used to create an interesting lighting effect. Additionally, props can be used to add realism to photos.
A diffuser is always best to use during product photography. But, if you don’t have one, what is the alternative? In such cases, you may use a plasterboard or white sheet.
This is the place where you should apply your creativity. A great photograph is the result of a creativity mind with proper photography lighting.
Avoid Reflections
Reflection can cause problems for a photographer during product photography. The reflection of the light source onto objects in the photo can cause the photo to be clouded, darkened, or even distorted. Additionally, the product’s light can reflect off objects in the photo and cause it to look artificial or fake.
Products like jewelry, glass, and bottles have reflective surfaces, and it is very hard for a photographer to capture them perfectly. Nobody will like any reflection on product images.
So, what’s the solution? In such cases, you must pay more attention to camera lighting arrangement. It would be best to keep experimenting until you find the perfect configuration
Use Proper Studio Light
It is important to use proper studio lights when working in a studio. If you use too much light, your work will be difficult to see, and you may not be able to produce the results you want. Use a light appropriate for the task at hand and ensure that your camera also uses appropriate lighting.
There are a lot of different types of lights that can be used in a studio, but proper studio lights are important. Proper lighting can help make your work look more professional and create a more consistent atmosphere. You can use a few lights in a studio, but these are the most common: Fluorescent, LED and Tungsten.
- Fluorescent:
Fluorescent lights are great for reading, working on projects, or enjoying daylight. Fluorescent lamps come in various types and colors to find the perfect one for your needs. The modern type of light gives you bright shining at cheap pricing.
- LED Light
LED light is a type of light that uses semiconductor diodes to emit light. LED lights are becoming more popular as they are energy-efficient and last longer. They can also be used to light up different areas, such as inside a car, kitchen, house or office.
- Tungsten
Tungsten light is a light bulb that can last up to 25,000 hours. It is also known as the most durable light source in existence.
Tungsten has a higher temperature than other types of lights, such as fluorescent or LED. This means that it will consume more energy and produce more heat. The downside of tungsten bulbs is that they are expensive and heat-producers.
Compared with the three types of light, LED light could be the best option for use in the studio. It is cost-efficient, gives a bright shine and doesn’t produce heat which may make you uncomfortable at the workplace.
I prefer this light in my workplace. However, it is your choice, and you may compare using all of them and find the best one for your studio.
Take Advantage of Photography Tools to Create Better Photographs
Regarding product photography, you can use a few simple tools to make your photo shoots more effective. Using these tools, you can improve the results of your product photos by making them more consistent, accurate, and attractive.
- Tripod
For product photography, a tripod is an essential piece of equipment. Using a tripod, you can stabilize your camera and avoid shaking when taking pictures.
Best gopro tripods for photographers
- Backdrops
Backdrops are a necessary part of any photography session. They can help to add an extra level of professionalism to your photos or provide a more natural look for shots taken in natural settings.
There are a variety of backdrops available, and you can find one that fits your specific needs by checking out the size and style of the backdrop you want. If you are looking for a backdrop that is lightweight and easy to carry around, a single or small-sized paper backdrop is ideal.
Ensure that the backdrop will create the same look and feel as the product you’re photographing. You also must ensure the backdrop can support your product for an extended period – typically around 8 hours or more. Lastly, make sure you have enough space for your subject and equipment before starting to take pictures.
- Stands For Backdrops
When you decide to use backdrops for your photography session, you must consider using stands for your backdrops. Without it, it is quite impossible to hang backdrops.
Placing it on a wall or table could be a solution, but for more professionalism, a stand for backdrops is a must.
- White Cards or Boards
There is a lot of debate over what type of card to use for product photography. Some people prefer white cards because they are easier to print and look good. Others prefer boards because they are more durable and can be used for multiple products simultaneously. Even some people think it isn’t necessary for product photography. Ultimately, the decision comes down to what type of photos you want to take and how you want them to look.
These are common tools that can help you to capture great product photos.
Ideal Light Arrangement For Product Photography
Lighting can create an ideal photo shoot environment for product photography by controlling objects’ light levels and placement. By using the right light, the photographer can control the overall look and feel of the image. Additionally, using a flattering light source will create a more natural appearance for products.
When photographing products, it is important to have the perfect lighting arrangement to capture the product in its rightful place. Some products are better photographed when placed in certain positions, and certain light sources can create beautiful results. This topic will demonstrate how to photograph products using the ideal lighting arrangement.
Studio Light setup for product photography tips
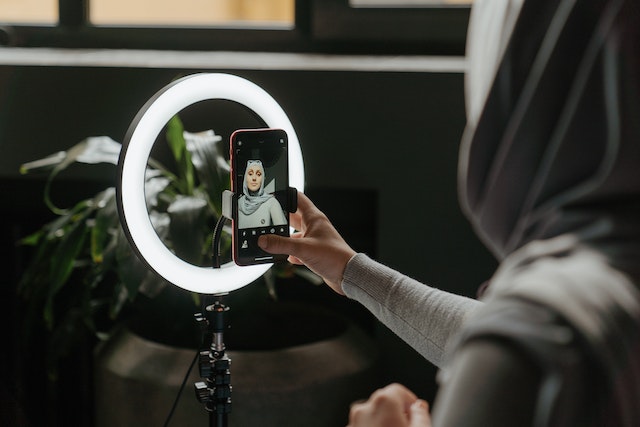
Ring Light [ One Light] – For Bright Front Lighting

When photographing products, Ring Light can be the perfect tool to add a little extra warmth and life to your images. With its soft light and adjustable distance, Ring Light can create beautiful, natural images that look great on any product. With their soft light and long-lasting battery life, they can be used to capture candid or professional shots.
However, while using ring light for photography, keep it at a standard distance from your object. It spreads out bright light, which may create harshness on your objects.
In addition, You should avoid ring lights for brightly colored objects. Though you can capture, the chances of creating lots of blown-out highlights are very high.
So, the best light arrangement for a ring light is to keep it a standard distance from your object.
Overhead Light [One Light]- For Moody Shots
The Overhead Light arrangement is perfect for capturing moody shots. It has a soft, unobtrusive light that can be used in many ways to create unique and interesting shots.
It allows you to control the exposure of your image, which in turn controls how much light your image gets. You can also choose how wide your shot will be based on the distance between your subject and the light source.
However, it is an excellent light setup for product photography, especially for wine products that demand a moody, darker shot.
Direct Font Light [One Light] – For Bright Lighting
The direct front light is a lighting technique used for product photography to add a highlight to the object or person in front of the camera. This light is enabled by using a high-output light bulb, such as a bounce light, to create an intense light source in front of the subject.
This type of light is focused on the object and can be used to produce a variety of effects. However, you should keep focus on your subject as this light spreads a bit of bright light. Try to keep a standard distance[ not too close, too far] between the light source and the subject.
An arrangement between a fast lens and aperture will help you to capture your desired product photos, especially when you don’t have much control over backdrops.
I won’t tell you about the exact settings because they may vary. The experiment will help you to find the perfect one for your shots.
Light setup for product photography [reflective products]
Two Lights for Reflective Products
There are a few things that you need to keep in mind when photographing reflective products. One of these is using two lights. This will help to create a more natural and realistic look for your product. Another thing to remember is that you want the light source to be on the front of the product and not towards the camera.
Again, never point the light source to the product without a diffuser. In addition, your lighting position must be in an angled base, not direct to the product. It will help you to eliminate reflections.
Pointing to a 45° angle from the camera could be the best place for lighting. However, you may experiment with it and find the best position to place the lighting.
Using dark backgrounds can help you to reduce reflections. However, it is your choice as many people don’t like seeing dark backgrounds, especially in product photography. If you prefer to keep white background [what I like most], you may use non-shiny matte backdrops.
If you can bring your diffuser as close to your product, separating from the light source and getting it to your camera frame, it will also help reduce reflections.
In such cases, continuous lighting may help you as you can see how light movement affects your frame. After having all preparation, you may need product photo editing skills to eliminate reflections perfectly.
Full Coverage [Three Lights] to capture all the Details
Photography can capture all the details of an object or scene, from the smallest details to the most iconic moments.
Using photography as your go-to for capturing your subject’s details, you can create stunningly realistic images that will leave your spectators looking like they are right there in the scene.
Full coverage allows photographers to capture products perfectly as they have various angle light sources like angle, direct front and sometimes backend.
While using three lights, you must ensure that lights are placed at right angles and products are lit nicely. It would be best if you experimented with placing the light.
The triangle light setup for product photography [Three light]
The triangle light setup for product photography is common. It is a three-point lighting setup that emphasizes the form of the object.
The three lights are positioned around the subject at 45 degrees to each other. The top light is positioned to create an upward light on the subject, while the bottom is positioned to create low light. The third light, positioned in front of and slightly above the camera, creates an even illumination on both sides.
There are no specific rules for positioning the light. You can experiment with this setup and find the ideal setup for your photography.
Photographers use this setup so that products don’t look flat. It is a very popular light setup for portrait and still life photography. However, You may use this light setup for product photography also.
There is another version of triangle light setup, known as separation light setup. If the background blends too much with products, you may separate it by placing the light in the backend.
In this light setup for product photography, two light will be set focusing on the backend wall, not on the product. It will create a nicely lit cast that will bounce your topic to the front.
Natural Lighting for product photography.
Natural light can be used to great advantage for product photography. By using natural light, you can avoid the need for artificial lighting, which can cause the photographed product to look too bright or too dark. Additionally, using natural light can help you capture an accurate representation of the product.
Find The best Time
Natural lighting is not always the most flattering for product photography, but it can provide a more realistic and realistic look for products. Using natural light, you can avoid making your product look too artificial or bright and also help you capture an accurate representation of the product.
When shooting in natural lighting, it is important to find the best time for your shot. It will allow you to get the most accurate results. Surprisingly, There is no one “best” time to shoot a photo, as the best time for each individual can vary depending on the subject and the environment.
However, some general tips for finding the best shooting time in natural lighting include knowing your priority light sources, setting up your camera with proper exposure settings, and using correct lens types and focal lengths.
When shooting at night, it is important to find a time to allow you to shoot without Illumination. This will allow you to create more detailed and clear photos and videos.
When the sun is shining brightly in the morning or evening, it could be the right time to shoot. But, if you have enough time, you can try to shoot the photo each hour and analyze the differences. It will help you to decide about the right time.
Using a diffuser while photographing in natural lighting would be best because it will help spread light on a level. Don’t forget to take advantage of the softness of the window’s light. However, you must depend on the weather in case of natural lighting shoots. It may disturb you so much, and for this reason, photographers love to take studio shoots.
Continuous vs. Strobe light; which light setup for product photography is perfect
When it comes to lighting, there are two main types: continuous and strobe. Continuous lighting is the type that is always on, which can make it difficult to find a good spot for your light. On the other hand, strobe lighting is where you turn the light on and off quickly, making it perfect for certain events or tasks.
This can be a difference in how the light feels or looks. Continuous lighting can be used for various purposes, such as during photo shoots or stage performances. Strobe lighting is often used for movies and video games to create a more intense or dramatic scene.
Continuous lighting uses a continuous light source, such as a light bulb or LED, to create a consistent illumination. This type of lighting is often used in photography and videography to give the appearance of natural darkness or ambiance.
Finally, you should go for continuous lighting for product photography. It gives more control while capturing product photo shoots.
Natural vs. studio lighting: Which is better for product photography?
When choosing natural or studio lighting for product photography, the decision depends on the photographer’s needs. Natural light is often less flattering to the face than studio lighting, while studio lighting allows photographers to create more realistic images. However, both types of lighting can be helpful in certain circumstances.
Conclusion
In conclusion, product photography lighting setup is important for photographing products. Here are 5 tips to get the best results:
1. Get a light setup that suits your needs.
2. Use the right light for the product you’re photographing.
3. Use a tripod to keep your photostable.
4. Use a reflector to create bounced light and highlights.
5. Use a shutter speed appropriate for the scene and the time of day.
To find the best light setup for product photography, you must experiment with the photo shoot. Different types of product photos demand different types of lighting. Without an experiment, selecting one light setup for each photograph is impossible.
Want a Clean Product Image? Try Our Product Photography Editing
Do you want an attention-grabbing product image for your stores that will generate sells itself?
You don’t need to be a photoshop expert or don’t need to spend your precious time editing product photos. All you need to hire is a professional eCommerce product photo editing Service Company that can meet your demand at your budget.
If you need to edit product photos, Clipping Path Action is the right solution partner for you. Try our editing today.
Read also


