

It seems you are willing to find out how to remove background from Image. There are lots of softwares that can expel foundation from photo. Photoshop and GIMP are common software those are used in this case. As Photoshop is paid software, a few people love to edit their photo via GIMP. This tutorial is especially for GIMP user. In this article you are going to know about how to remove background in GIMP. So read the whole article attentively.
how to remove the background in gimp easy task
At the very first step opens in GIMP. One can open his image in two ways. There is an alternative to open the image from archive pursued by or one can drag the image directly.

If anyone feel that it is not fit to the window, at that point made slide change from the zoom option. You can zoom in or zoom out to make the image look perfect. I am setting the zoom level. As you can see zoom option is available in the view section.
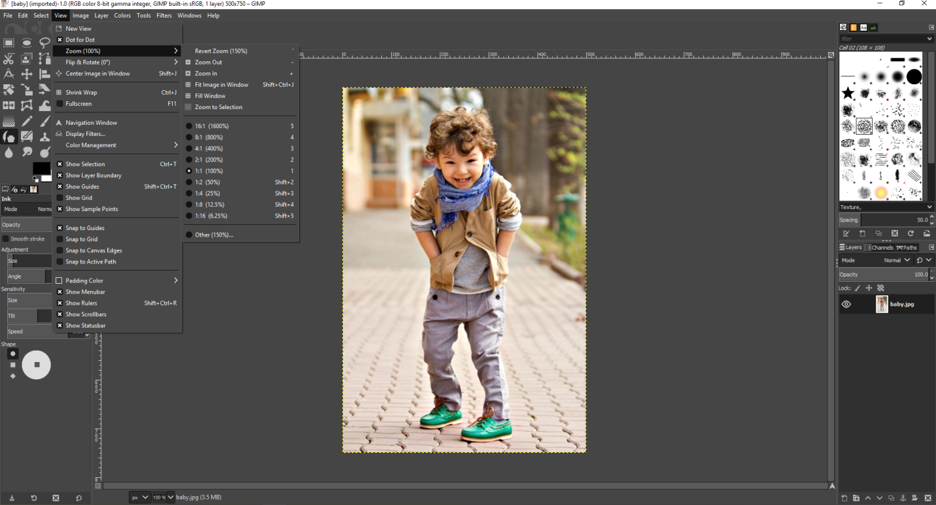
In this case, anyone can use a keyboard shortcut CTRL+ SHIFT+J then your image will be fit automatically according to your image size. Isn’t it a great tip? It is just the start buddy more tips are waiting for you. Let’s jump to its next step.
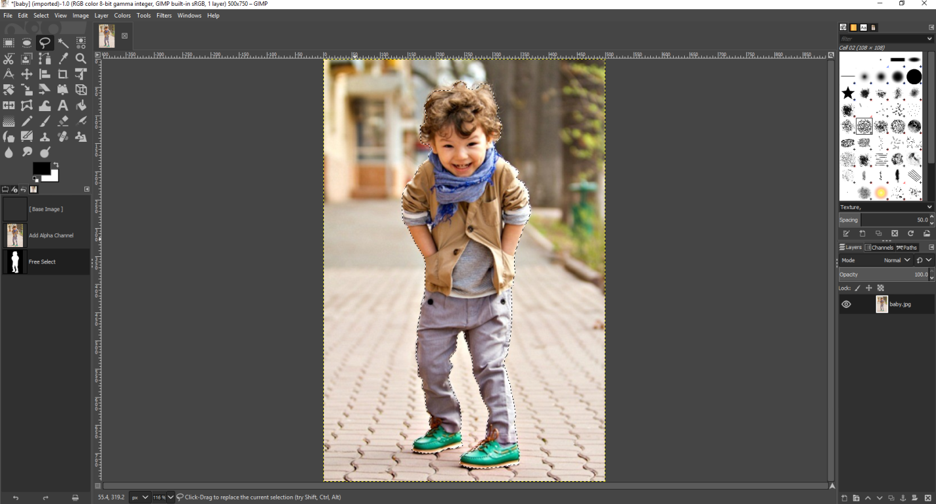
In the 2nd step, you need to go to the layer section and click on add alpha channel. Then one can inspect text will be change into Normal from the bold style. That means now one can customize the transparency.

As our motive is to remove background on GIMP so we need to mark the object. There are many options in GIMP for this kind of stuff. I can feel that you are a beginner so we are going to apply a simple way. The tool that we are going to use is free select tool. Active this tools from the left panel or use the shortcut F.
How To Remove Background In GIMP | Best Ways To Delete Background To Transparent with GIMP
After this start selecting from a specific point and perform it precisely. For making your selection stuff easier you can zoom in the image by pressing CTRL and mouse down scroll at the same time. Make sure that you end up your selection right at the point when you started. Make the selection process very carefully. Cause, ultimately this will decide how your image will look finally.
After you complete the selection process complete the press ENTER button. When you do any mistake while selecting, don’t need to be afraid. Simply click on backspace. Press and hold your mouse scroll to move the image.
OUR POPULAR SERVICES
Background Removal Service
Color Correction Service
Raster to vector conversion service
drop shadow service
Ghost Mannequin Photo Editing Service
image masking service
Jewellery Photo Editing Service
Landscape photo editing service
Neck Joint Service
Newborn Photo Editing Service
Photo Manipulation Service
Photo Retouching Service
Portrait Photo Editing Service
Product Photo Editing Service
Real Estate Photo Editing Service
Wedding Photo Editing Service
Clipping Path Service
Be careful, when you are selecting the hair. After you complete the primary selection option you might face a problem.
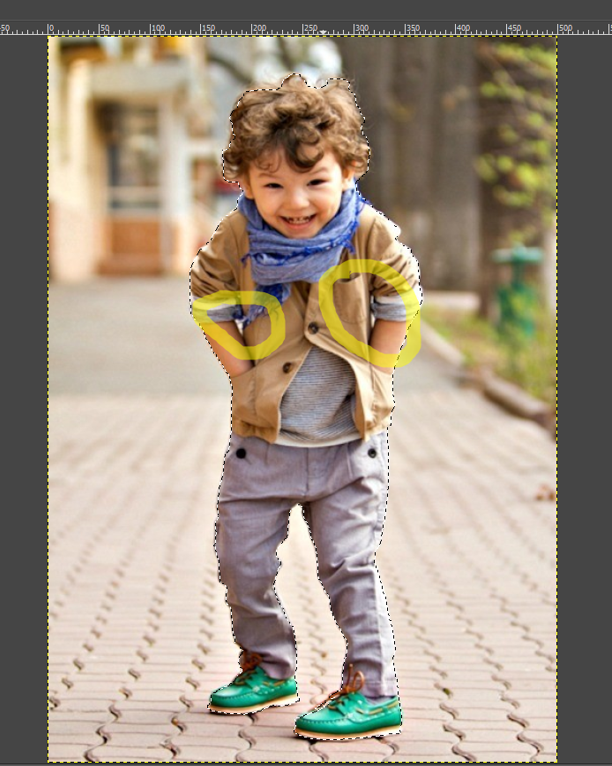
There will be some blank space without selecting. You can’t keep these otherwise it will effect on the final look of your image. For remove a background in GIMP perfectly, one need to clean all the background smoothly with ease. That’s why you need to clear this.
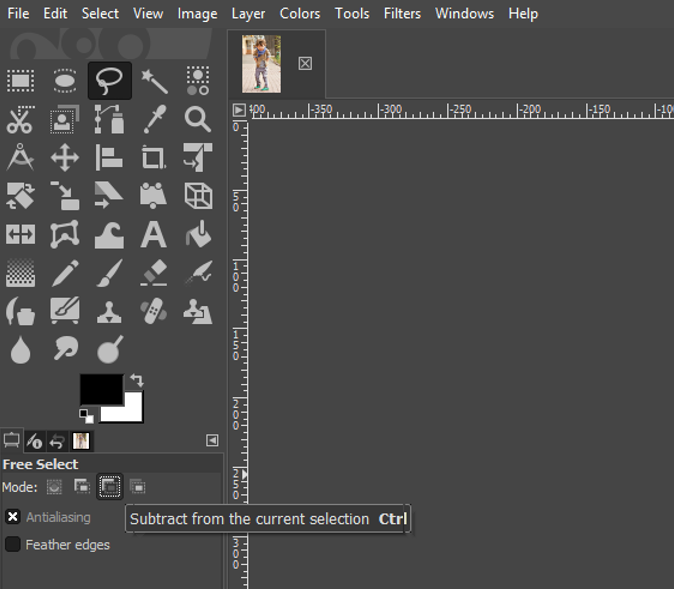
For this reason go to instrument alternative and choose the third option called Subtract from the current selection. Afterwards point out the remaining blanks carefully.
Zoom in to those portions and make the selection properly and press enter once again when you finish.

Now the selection job is done almost. When you complete your selection task fit you image according to the window by pressing CTRL+ SHIFT+J once more. Is the job complete? Not yet readers, there are some more important task left.
Now we need to adjust the feather otherwise it will show up some visible edges when we finish. For adjusting feather, one need to go to the select option.
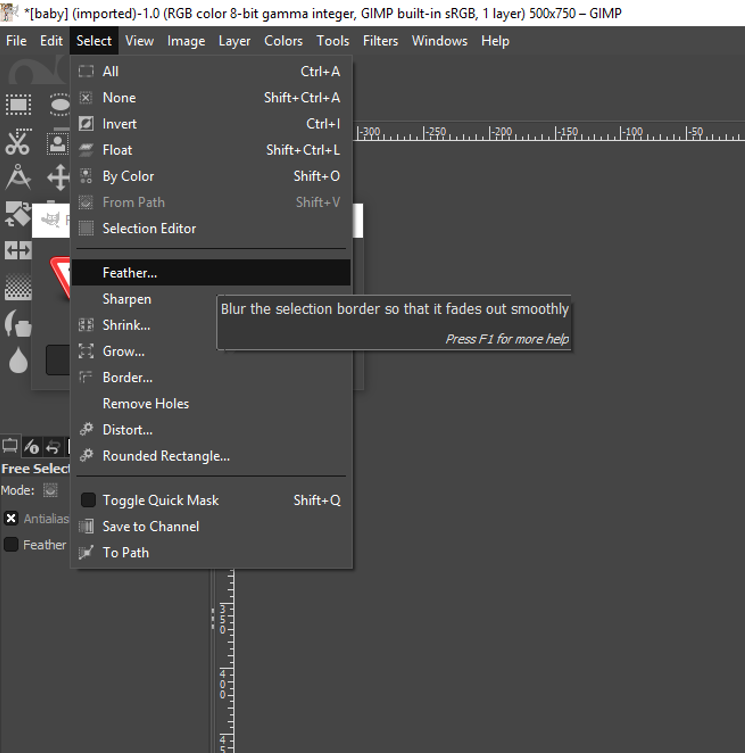
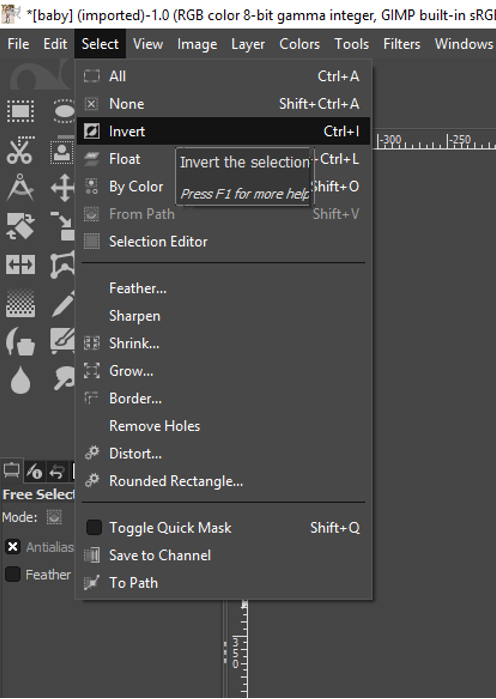
Set the feather value dialogue box to 5000 and press enter. The reason behind setting the feather too high is the edges are not going to be so hard, at the same time image is going to look more natural. Overall, that is really a good deal. Now the selection job for the object is complete. But can you remember our motive? It is remove background using Gimp. So, all we need to do is to reverse the selection. For that purpose, go to select and press Invert. Or you can also select the background by pressing the keyboard shortcut CTRL+I.
Later of this part, we are almost in the final stage. Now the thing that we need to do is go to edit and select the clear option.
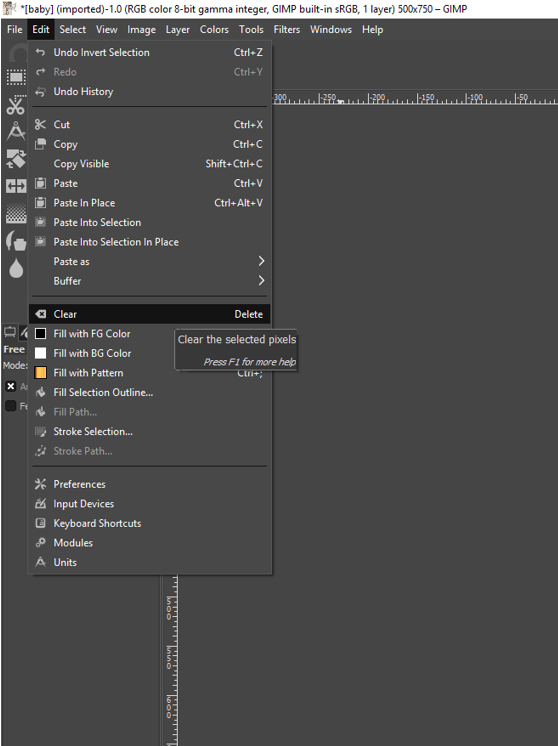
After you click on the clear to remove the background! Just like that
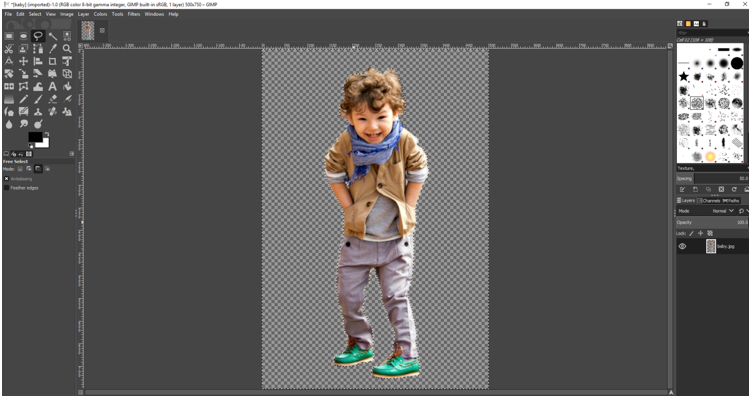
You have completed GIMP layer mask Remove background and your task is not fully done there are some more stuff one needs to do. That will give the final touch to the image. Inspect the selection mark is still available in your image. We need to erase these marks. So now we need to perform GIMP delete Selection. In this case we need to go to the select option and choose none and then press the Enter. Then photo will look like something that.

One can do some more stuff to look his image more natural. He can work on hair with smudge tool.
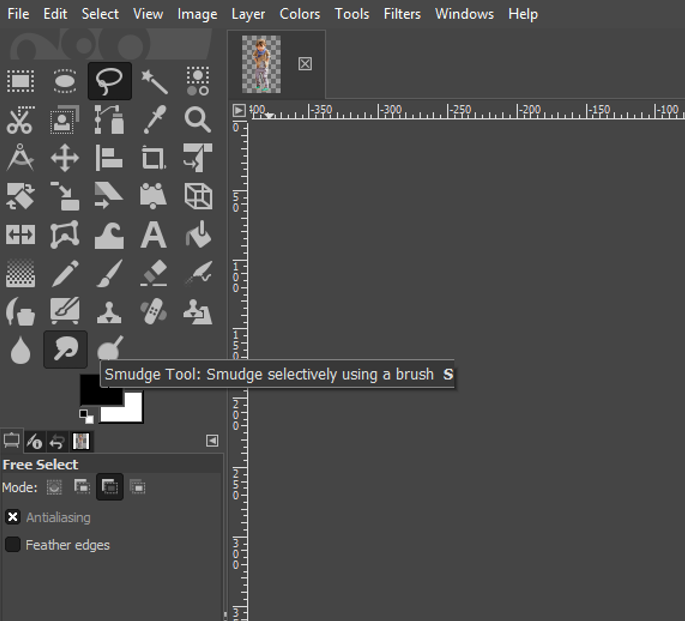
Click on Smudge tool and active this. After this, one needs to adjust the brush size. For working on hair it is better to choose the smaller size brush. So change the brush size into 15 or 25. After you make the correction it is the time to save the image.
But don’t save this image in normal way. Are you wondering then how to save this? As a matter of fact, you don’t have to spare the picture! Are you wondering At that point what to do? You should trade the picture.
Then go to image followed by export as. Then you will find a dialogue box like that. I want to aware that don’t try saving or saving as option. Later I am narrating why I am saying this.
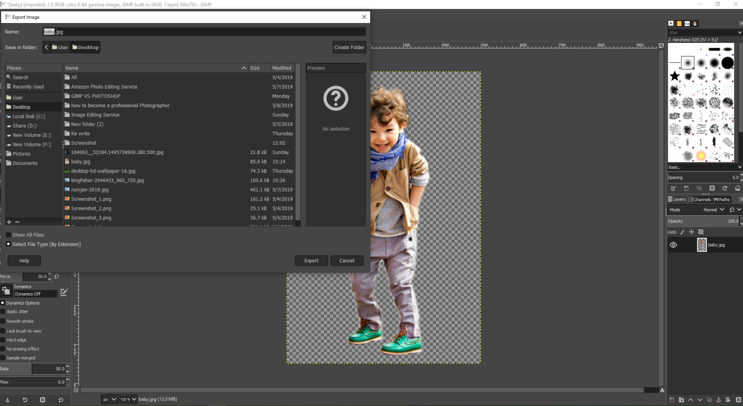
Choose the destination folder and rename the image name. Your task is not finish yet. Change the file type into png. Then click on export twice and a dialogue box will appear again. Then you need to press Enter. Your task is all done.

Look the before and after effect. Hope it will be helpful for you. In this GIMP background removing technique. Stay with us to get more awesome tunes. If you want to remove background from photo service you can try us. You are also providing all sorts of image editing service. Don’t hesitate to request for a quote.
Our Another post “At present, many people are showing their interest in Clipping Path. If you are also one of them, this article is especially for you. I am going to provide you a complete guide to clipping path. By reading this post, you can learn all important things about clipping path. Tutorial of clipping Path is also included in this post. So, this is going to be an important article if you are willing to this method.” A Complete Guide To Clipping Path
[optin-cat id=9621]


