

In sometimes, a great photoshoot may spoil due to harsh shadows. It creates an embarrassing situation for photographers. If you are a victim of this situation and love to remove shadows in photoshop, this article is for you. We are talking about how to remove shadows in photoshop using different methods.
Is this important?
Of course, balancing lighting and shadows while taking a photoshoot is a challenging task. After having all preparation, it is rare to capture photos as per the photographer’s expectation.
Though the situation is beyond control, we can eliminate unwanted shadows and lightning effects using photo editing software.
In our cases, we love adobe photoshop cc for completing our photo editing tasks. And, for this, we are going to show removing shadows in photoshop using adobe photoshop cc.
If you don’t have a photoshop license, try to purchase it. On the contrary, if you want to use it cost-free, read our guide about the photoshop crack version.
Now, you have the photoshop program; let’s start.
Method One: Remove Shadow In Photoshop [by exposure]
Step 1: Open an image in Photoshop
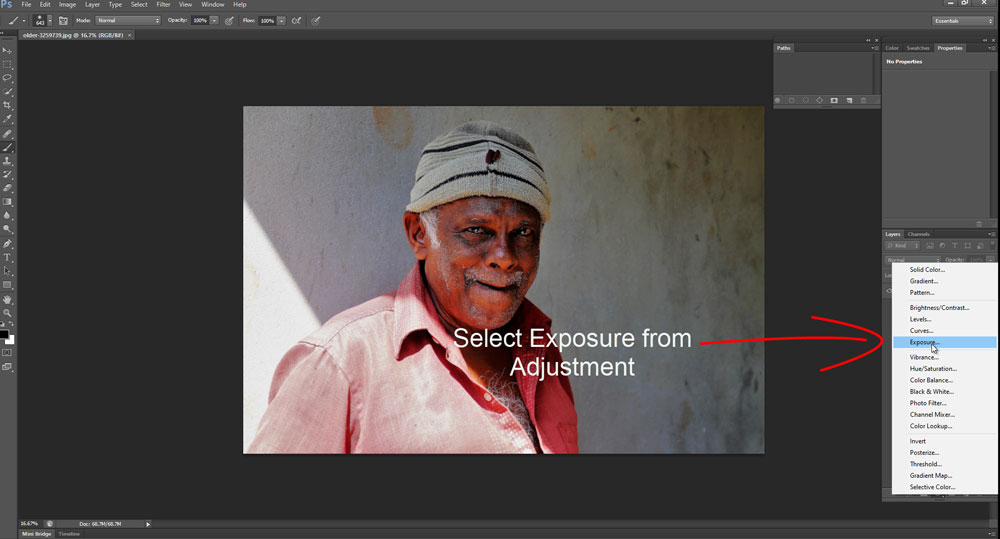
Step 2: Take exposure from adjustment
After opening an image in Photoshop, go to the layer palette to adjust and then select exposure.
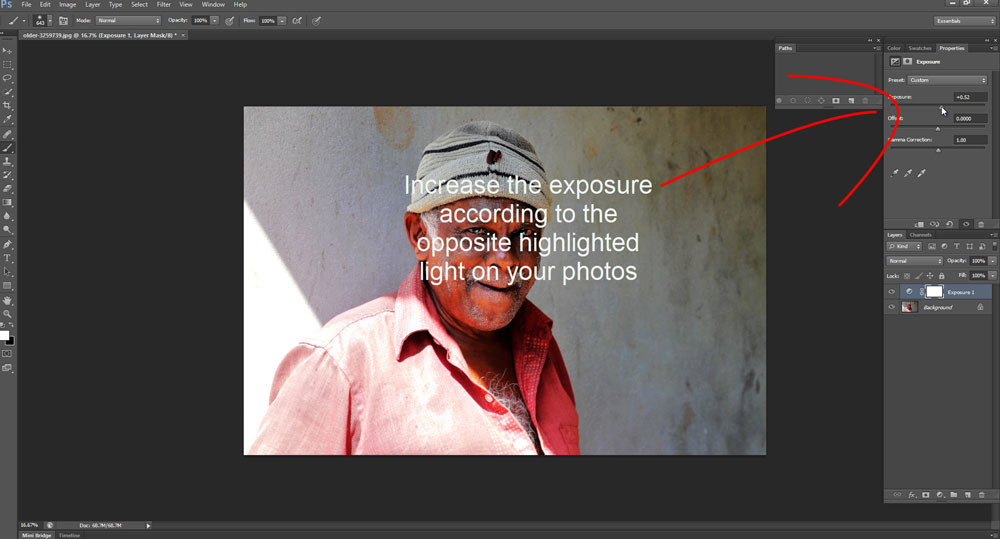
Step 3: Increase your exposure
Next step, after taking the exposure layer, increase your exposure according to the opposite highlighted area and match lighting with your existing lighting.
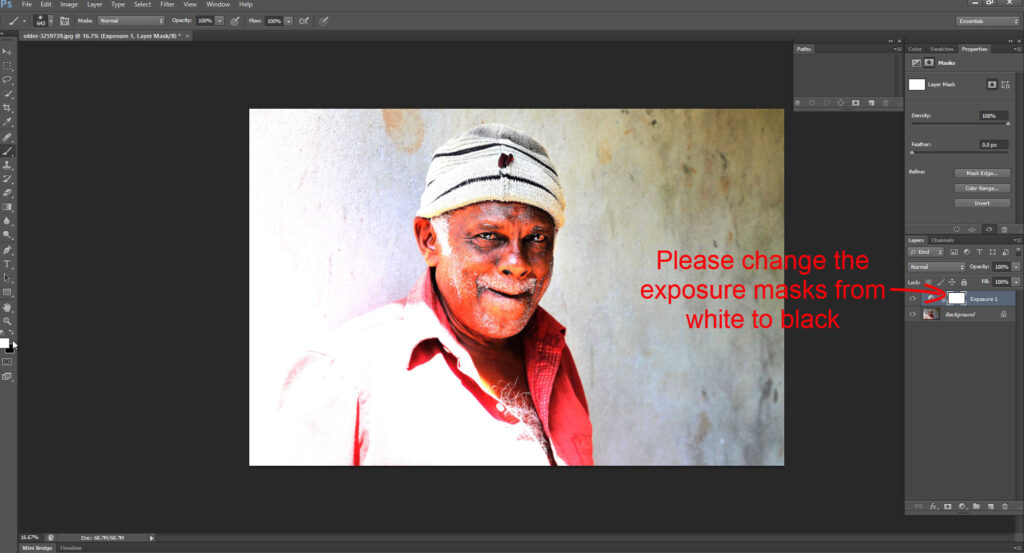
Step 4: Exchange the masks from white to black
Exchange the exposure layer masks from white to black, after exposing your shadow
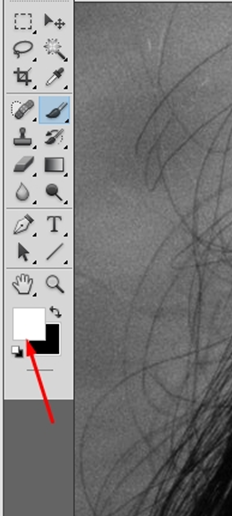
While you want to exchange the white masks for black masks, you need to reset your default color reset in the toolbar and press your keyboard D to the default color.
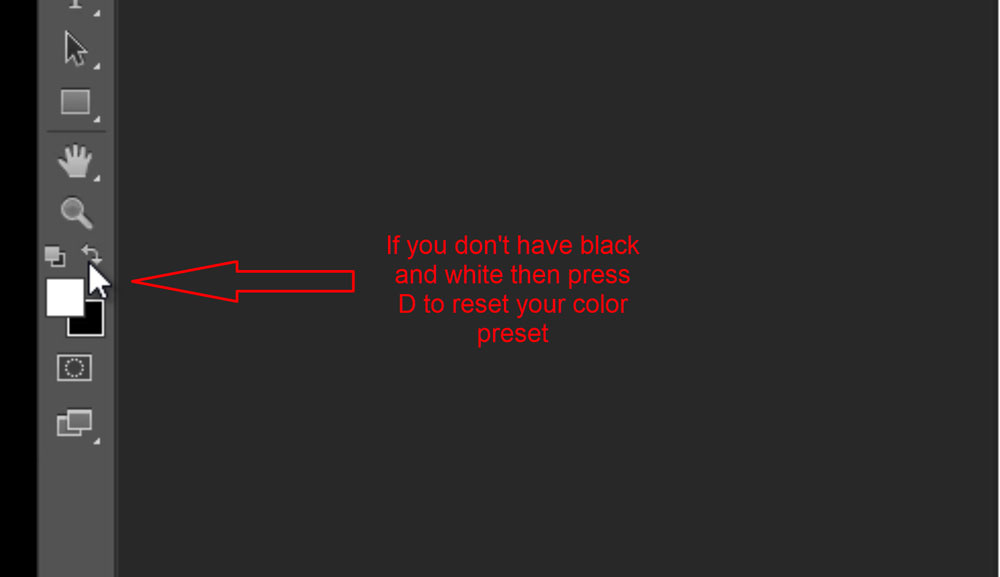
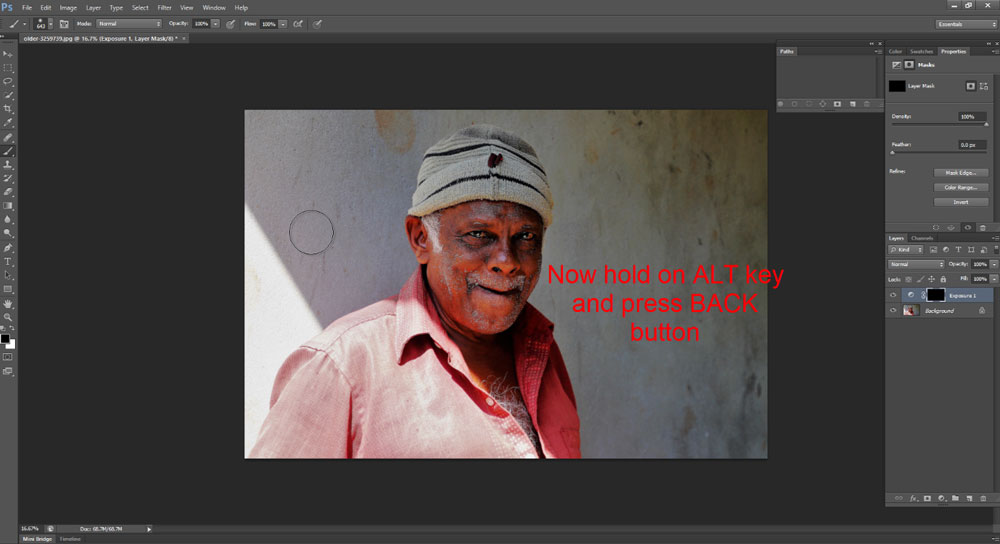
Whenever you are resetting the default color, make sure that you are selected now on top black color and then hold on your Alt key and press the back button (ALT+BACK) to make a black mask.
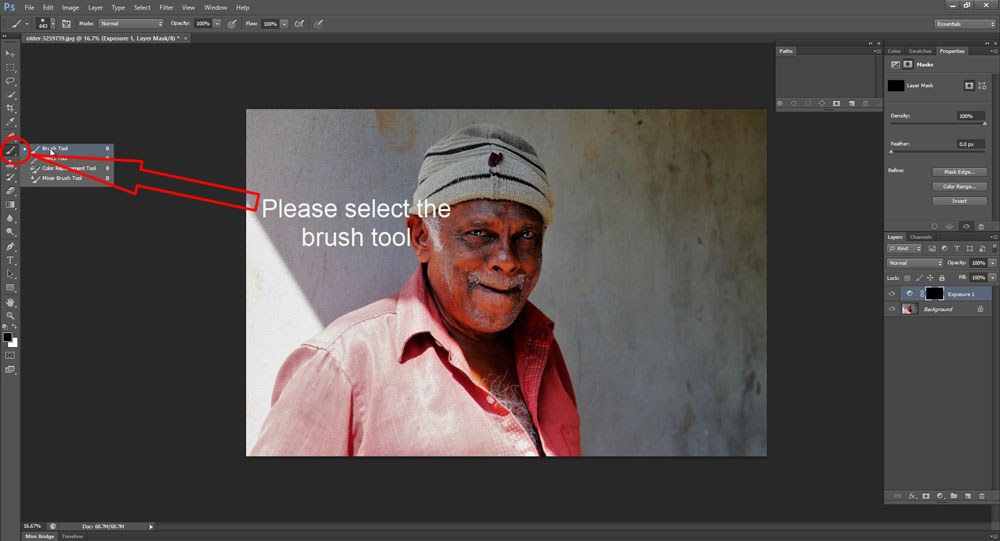
Step 5: Select Brush tool
After the black mask, select the brush tool from the toolbar.
After selecting the brush tool, make sure that the brush opacity and flow are 100%
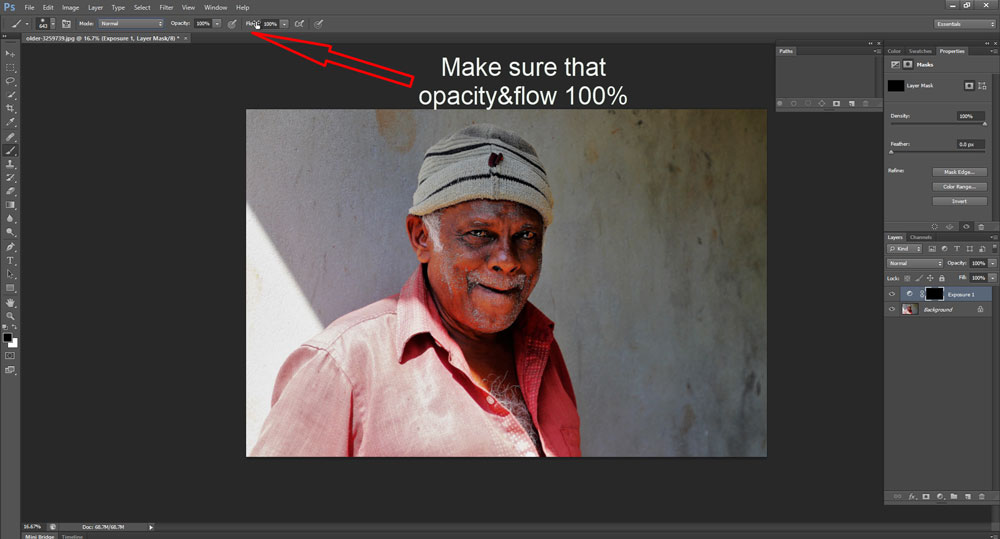
You need to ensure that your selected brush hardness is 0%. After select, the brush tool, click on your mouse right button and reduce your brush hardness to 0%.
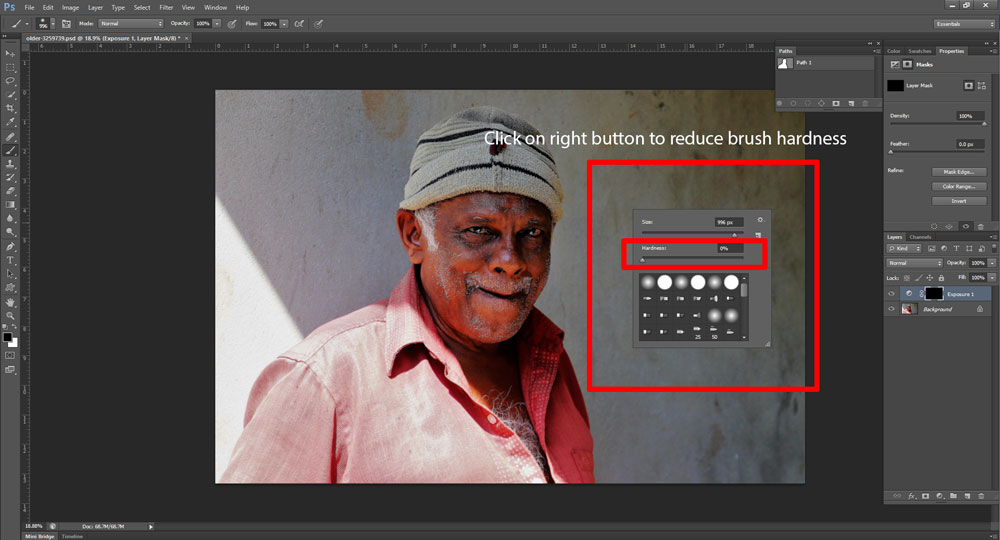
After ensuring the opacity, flow, and brush hardness, please select the white color in color preset as a default color.
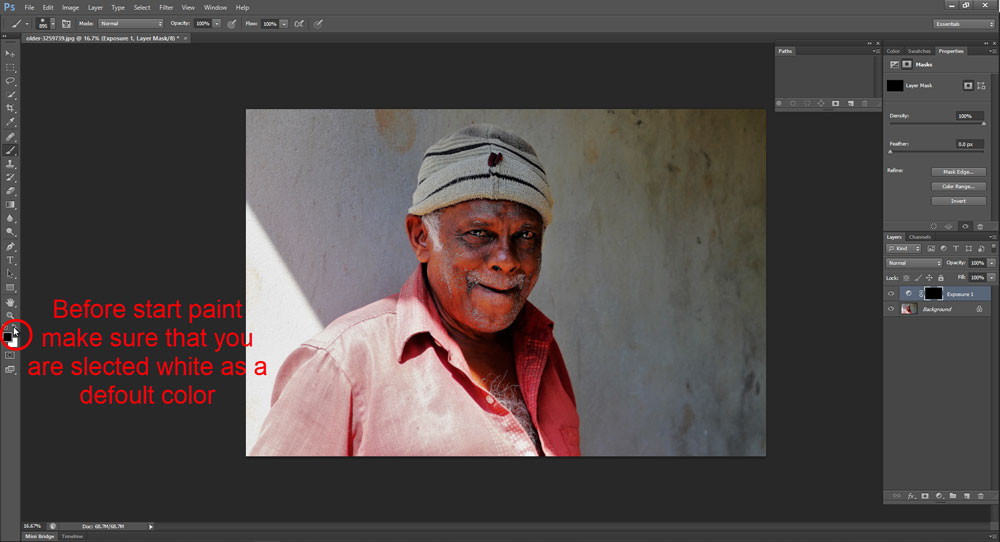
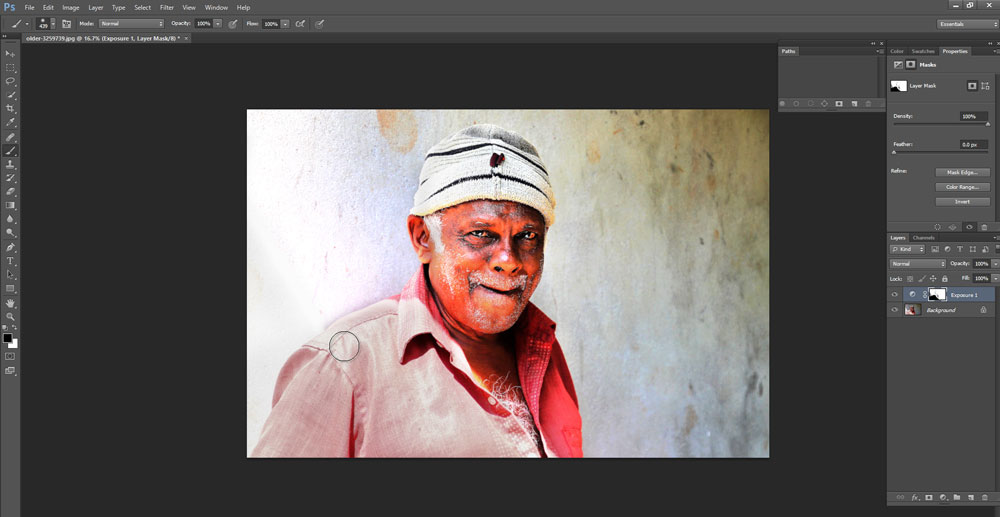
You can start now painting on your picture shadow area.
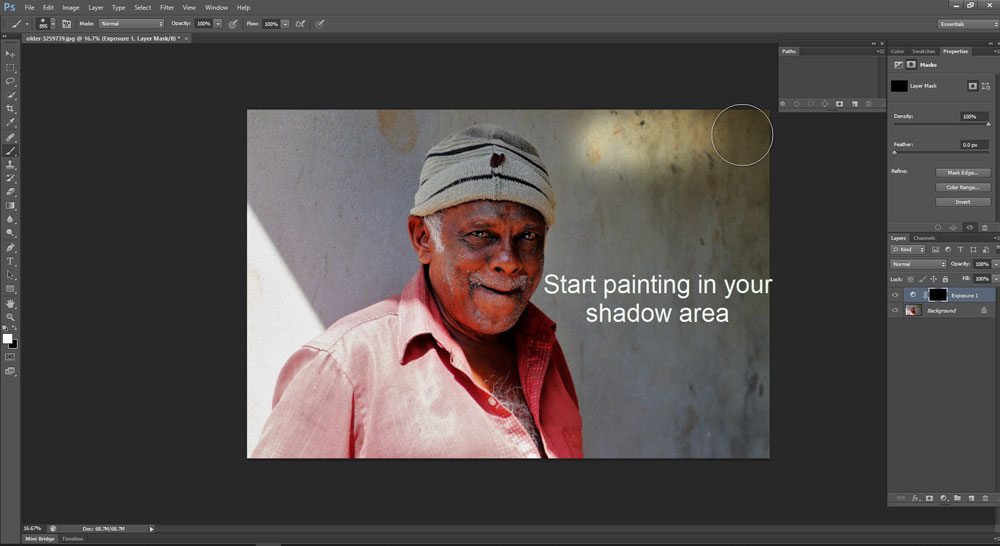
Please, use your brush tool on the selected layer masks.
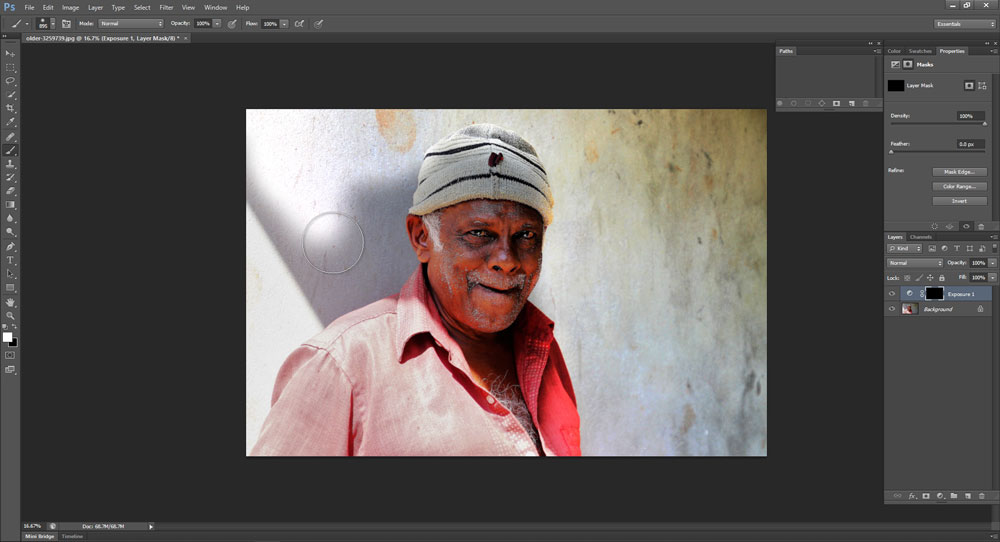
Would you please paint very carefully while you will paint on your shadow and highlighted border area? This area is tough to match the espoused area and highlighted area.
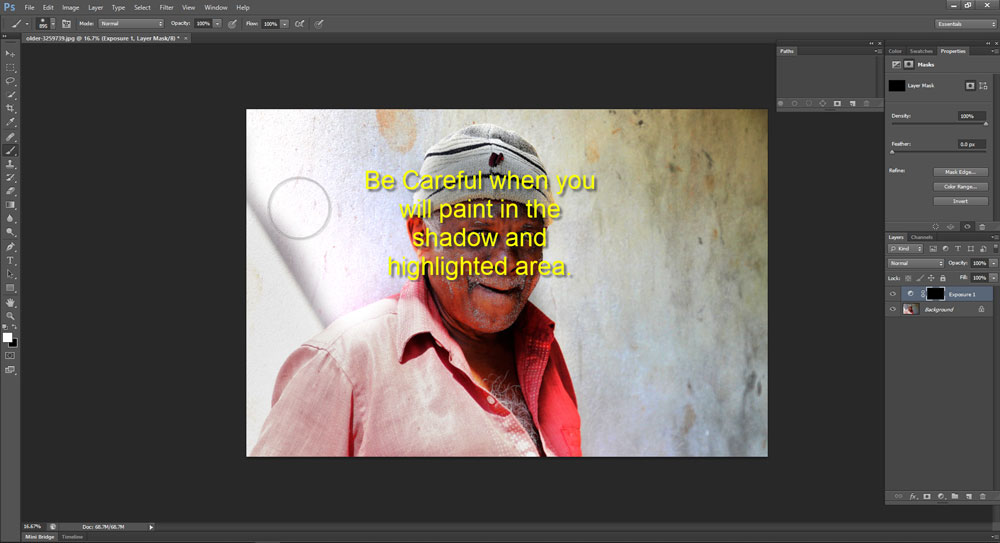
Don’t worry; if you can paint slowly and decrease the brush size, you will get your expected result with excellent output.
Step 6: Color Balance
After painting your shadow on the whole image, if you think that you need a balance of your picture color, you can easily do it by color balance.
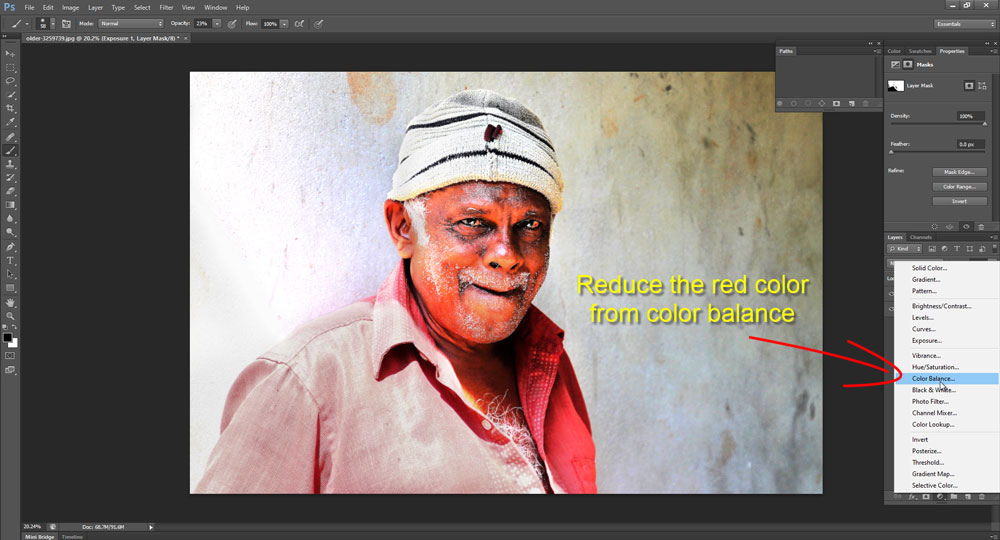
Just go to the layer palette and select color balance from adjustment, and now you can increase or decrease your unexpected color.
There is a little bit of redness we need to reduce the redness, after shadow removal from our picture. We will reduce the redness by color balance. You can see the 6 colors in the color balance palette. Cyan & Red in the first line, Magenta & green in the second line. Finally, yellow & blue in the 3rd line.
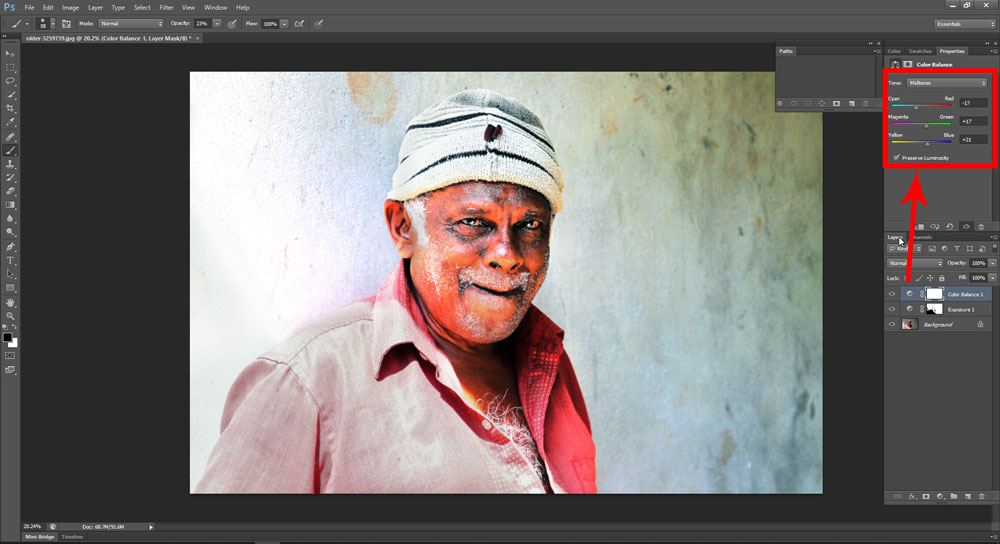
So if you want to reduce redness, then at first, you should drug the first line slider to cyan, the second line you should drug the slider to green, and 3rd line you should drug it on blue.
How much should the drug? It will depend on your picture color variations and your expectations.
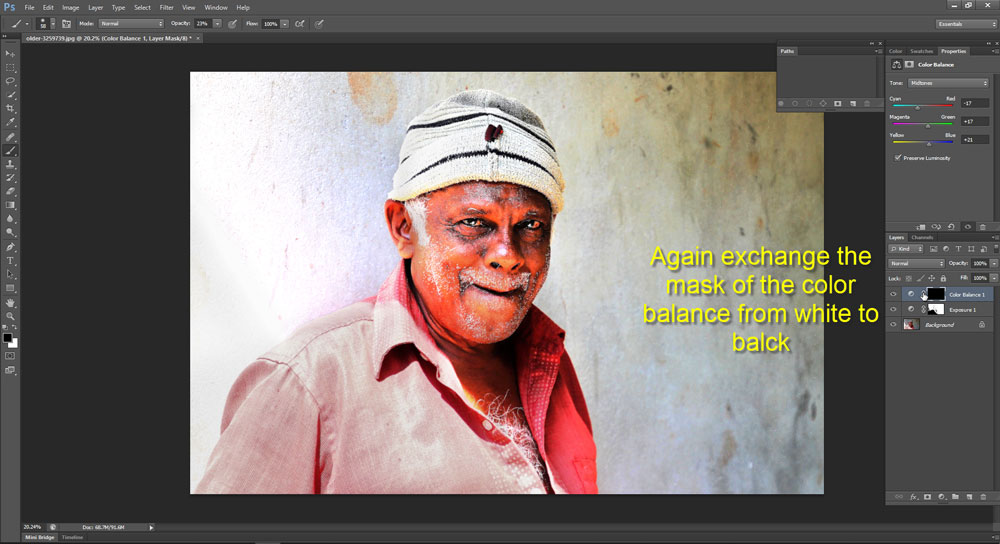
Please change the color balance layer mask from white to black.
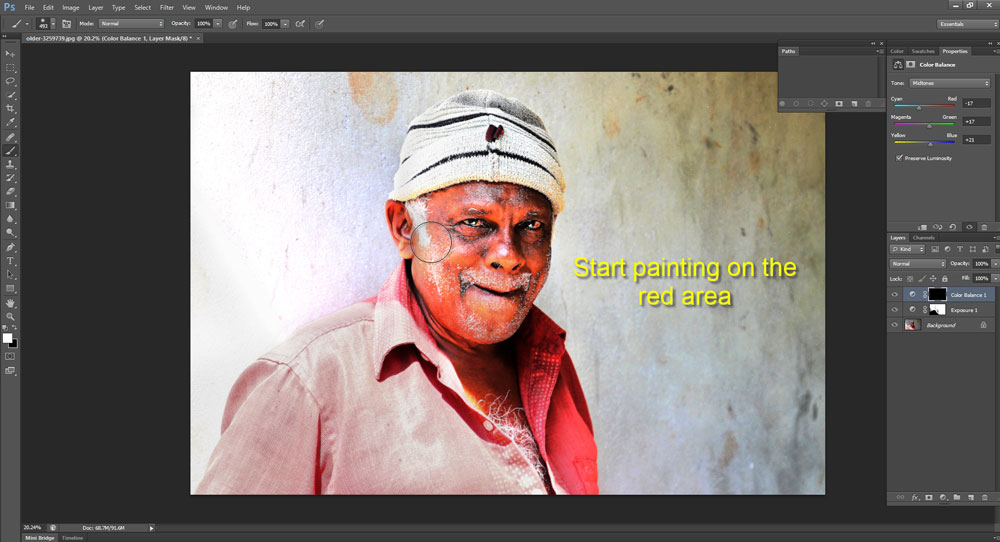
Now paint in the picture red area.
You can see the picture face redness is reducing a little bit.
That’s all.
Read More: how to cut out images in gimp and photoshop
Method Two: How to remove shadows in Photoshop [fixing the brightness]
It seems you are willing to get rid of unwanted shadows in your picture. You are on the right page. By reading this post, you will know how to remove the shadow in Photoshop. What’s the delay? Then let’s jump into the deep.
Shadow is a strange factor for a photo. If you place a shadow of an object correctly, it will pleasantly look in your photo. But, an image may a pale and tired face if shadows fall on it from another source.
From now on, you don’t need to have bothered with these kinds of irritating shadows. Allow me to show you the procedure step by step.
There are two types of techniques that can remove shadows from photos in an effective way. The first one is to customize the brightness and the second one is to fix the color.
Step 1: Open an image in photoshop

Step 2: Make it black and white
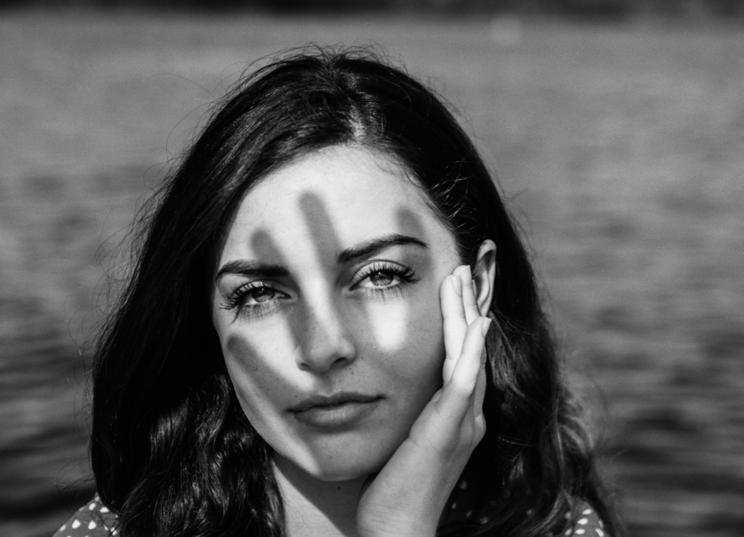
Notice in this picture, the shadow of the hand has spoiled the whole picture. Let’s fix it by changing the brightness.
Before we start the procedure of brightness change, you ought to know that you can’t make any change with color. You have to put the color aside.
That’s why go to the adjustment layer below, followed by creating a solid color adjustment layer.
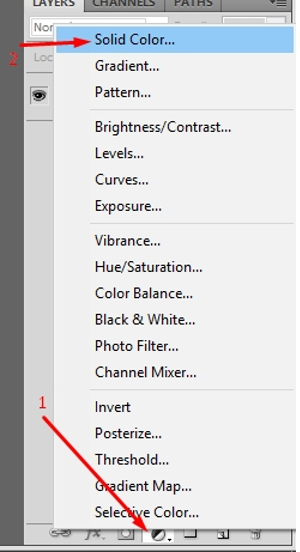
Then pick the black color from the solid color option. Then you will notice that the whole picture has become black. Now, you need to change the solid color layer blending mode from normal to color.
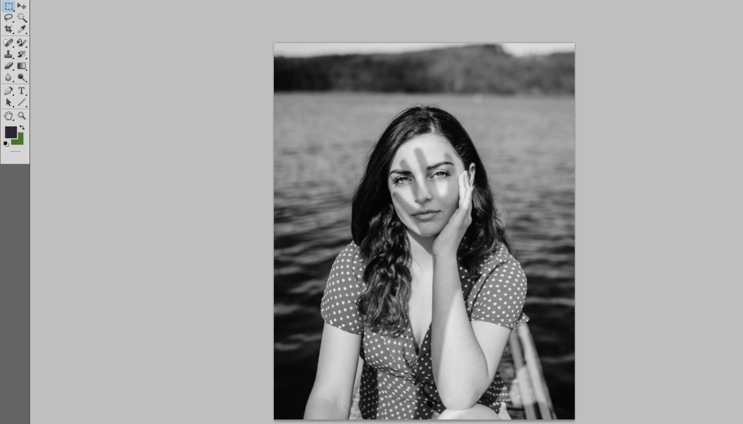
You can see this result as a black and white picture. Now the procedure starts for removing the shadow.
Step 3: Make the shadows more visible
To do so, open the curves option from the adjustment layer.
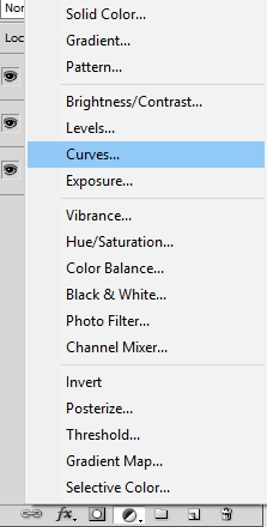
After this change, the curves line a little down to make the shadows more visible to inspect.
Now have a look at the picture; the shadows are more visible here.
It will make the procedure of removing shadows comfortable.
Step 4: Make a group for all layer and rename it as Luminosity
Then you have to make a group of those two layers. For this operation, click CTRL and the two layers followed CTRL+G. After this, you will find that it has become a group.
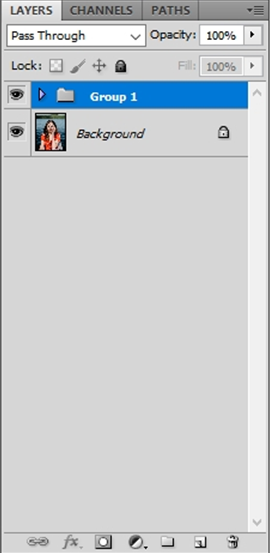
For convenience, in the further steps, rename this group name as Luminosity. We have changed the Luminosity here.
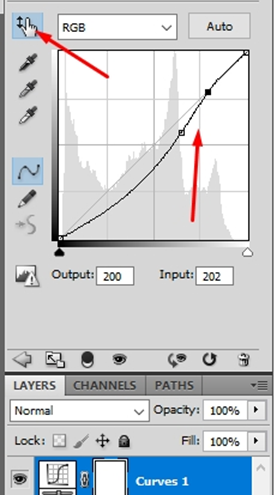
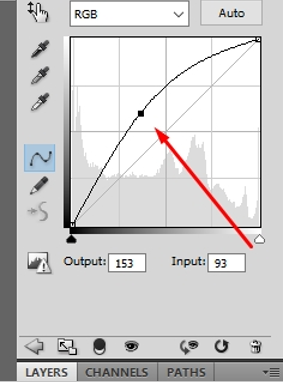
Step 5: Take a Curve and increase the Luminosity
After renaming the group name, go to the curves option once again by following the previous steps and set the line high from the middle like I have turned it in the picture above.
Step 6: Select the layer masks and brush
After this, select the layer mask option and choose a brush form toolbar.

Take a soft brush and set the value according to the below picture.
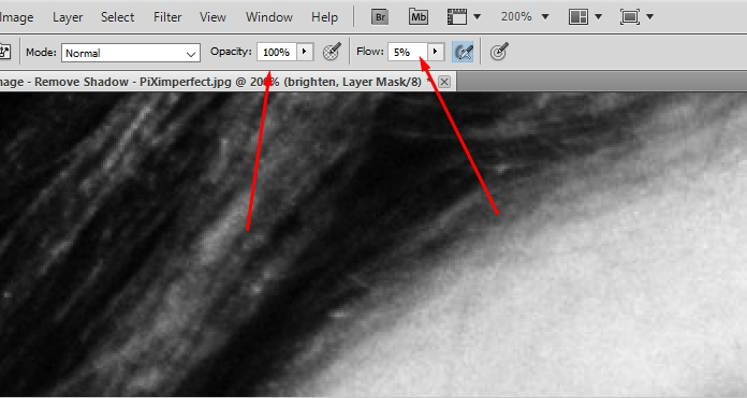
Step 7: Paint the brush over the shadow
Then zoom in the picture and start erasing the shadow by clicking the mouse over the shadows.

Step 8: Curve layer blending option to reduce the underlying value
Then carefully do it all over the picture. After this step, you have to go to the blending layer option by double-clicking on the curve layer.
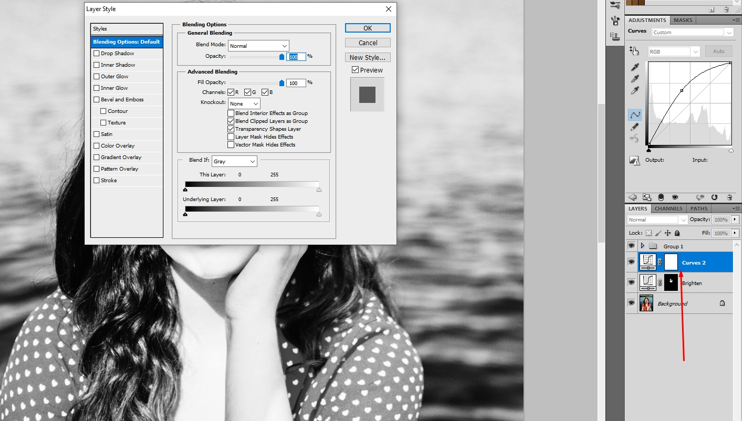
Then you will notice the blending option. You have to change the value of the underlying layer and make it lower by holding on ALT key.
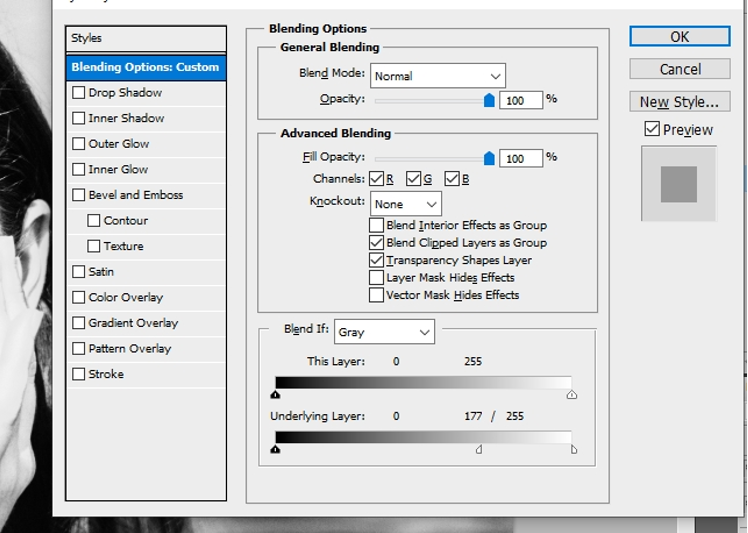
After setting it in this way, you will find soft shadows in the picture.
Step 9: Fix the shadow using the brush tool
To fix those shadows, set the background color white and pick a soft brush with the lower number of flow around 15%. And then start brushing over the shadow.
Step 10: Final Step
After brushing the shadow, you can see the perfect look of a picture without a shadow. When there is no spot of the shadow in the picture is ready to save.
Read More: how to change skin color in photoshop
Some Tips And Tricks To Remove Shadow In Photoshop
- Without taking the solid color from the adjustment layer it will be real tough for you to remove the shadow with perfection.
- Just changing the brightness and contrast will not give you accurate result. So, don’t depend on it.
- While working with curves in new layer don’t forget the make the selection inverse. Otherwise, the whole picture will become high in brightness that will not be ideal for a proper result.
- Don’t set the flow too high while working on shadow. try to keep the value something between 5 to 15.
- Don’t work with shadow with hard brush it will make spot on the picture.
- Don’t set the opacity too low while erasing the shadow. basically, a lower number than 90 doesn’t provide an accurate result.
Want More? Try Out Our Photo Post Production Service
We discussed how to remove shadows in photoshop. Hopefully, you will be able to do it at home.
If you want to avoid this time-consuming work, you can shift your project to us.
We deliver all types of photo editing services at a cost-efficiency price. Our expert team can help you to add or remove shadows from your picture. We provide eCommerce image editing services, including clipping path service, background removal service, shadow creation, photo retouching, etc.
However, you can try us at cost-free. We offer a free trial service for each new client. If you are one of them, Try us free today.
Let’s make images beautiful.
Cheers
Read More
Amazon image size requirements
Best app for real estate photos
[optin-cat id=9621]


